Day 9 Task: Deep Dive in Git & GitHub for DevOps Engineers.
What is Git and why is it important?
Git is a DevOps tool used for source code management. It is a free and open-source version control system used to handle small to very large projects efficiently. Git is used to tracking changes in the source code, enabling multiple developers to work together on non-linear development.
In summary, Git is important because it provides a robust and flexible version control system that supports collaboration, branching, and distributed development, all while maintaining data integrity and performance. It has become an essential tool for software development, enabling teams to work together efficiently and manage code changes effectively.
2.What is difference Between Main Branch and Master Branch??
The terms “main branch” and “master branch” refer to the default branch in a Git repository. The difference between these terms lies mainly in their naming conventions and historical context:
Master Branch
Historically, “master” was the default branch name used in Git repositories for many years. It originated from the original version control system called BitKeeper.
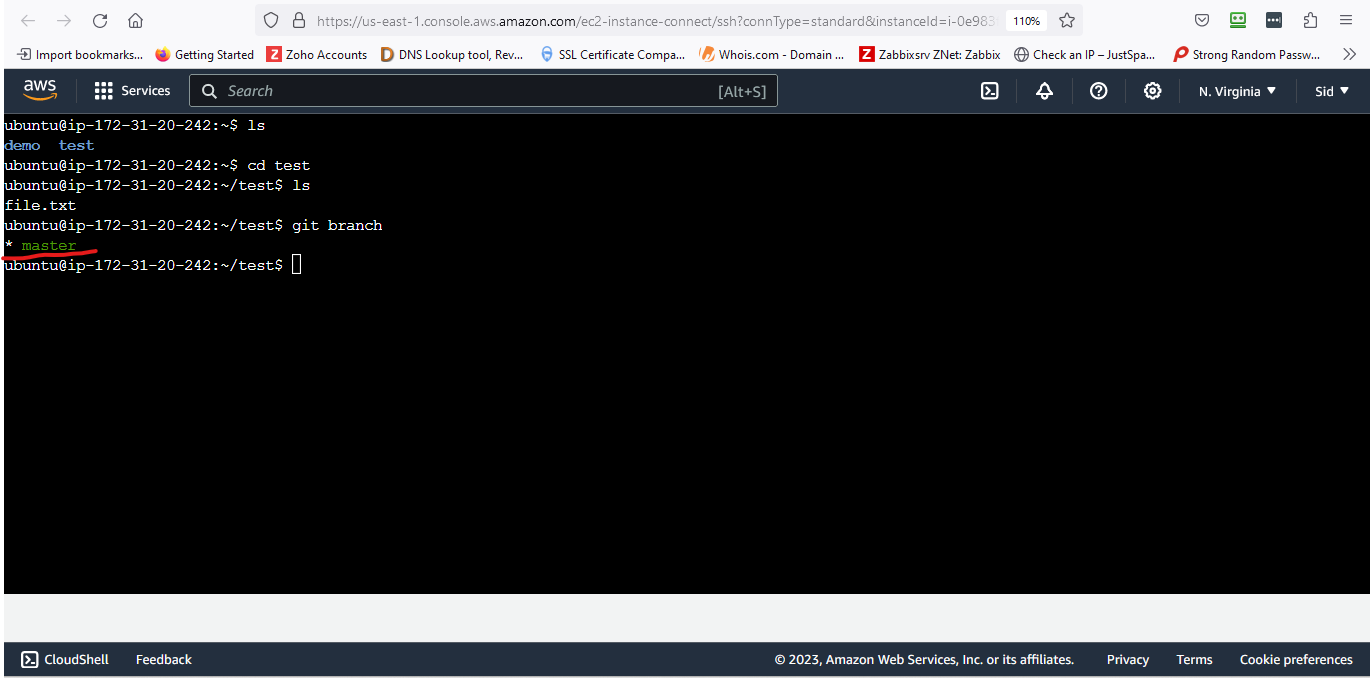
The “master” branch typically represents the main development branch, where the latest changes and features are integrated before being released or merged into other branches.
However, the use of “master” has been recognized as carrying connotations of slavery and oppression, leading to a movement to replace it with more inclusive terminology.
Master branch screenshot.
Main Branch
In response to the concerns raised about the term “master”, many Git hosting platforms and communities have moved towards adopting more inclusive naming conventions.
“main” is a commonly used alternative to “master” as the default branch name. It aims to promote diversity and inclusion within the software development community.
The “main” branch serves the same purpose as the “master” branch, representing the primary branch for development, integration, and the latest changes.
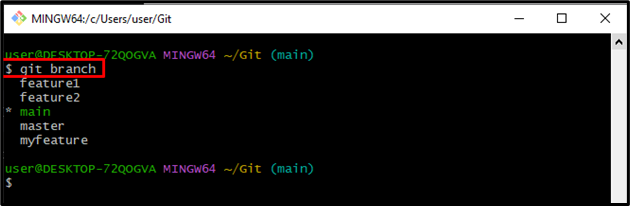
To view all available branches, use the “git branch” command:
git branch.
- The resultant image shows that all the branches have been listed successfully:
That’s all about the difference between the “main branch” and “master branch” in Git.
3.Can you explain the difference between Git and GitHub?
Git: Git is a distributed version control system for tracking changes in source c code during software development. It is designed for coordinating work among programmers, but it can be used to track changes in any set of files. Its goals include speed, data integrity, and support for distributed, non-linear workflows.
GitHub: GitHub is a web-based Git repository hosting service, which offers all of the distributed revision control and source code management (SCM) functionality of Git as well as adding its own features.
4.How do you create a new repository on GitHub?
Creating a new repository on GitHub involves a few simple steps. Here's a step-by-step guide:
Sign in to GitHub:
If you don't have a GitHub account, you'll need to create one. If you already have an account, sign in to your GitHub account.
Navigate to Your Dashboard:
- Once you're signed in, go to your GitHub dashboard by clicking on the GitHub logo in the top left corner.
Create a New Repository:
- In the upper-right corner of the GitHub page, click the "+" sign, and then select "New repository" from the drop down menu.
Fill in Repository Information:
On the new repository page, you'll need to fill in some information:
Repository name: Choose a name for your repository. This is the name that others will use to refer to your project.
Description: Optionally, provide a short description of your repository to help others understand its purpose.
Visibility: Choose whether you want the repository to be public (visible to everyone) or private (accessible only to people you give access to).
Initialize this repository with a READ-ME: You can choose to initialize your repository with a READ-ME file. This is often done to provide an initial structure and information about your project.
Add a .gitignore file and a license:
- Optionally, you can add a .gitignore file to specify which files or directories should be ignored by Git, and you can choose a license for your project.
Create Repository:
- Click the "Create repository" button to create your new repository.
Your new repository is now created on GitHub. You'll be taken to the repository's main page where you can find information about the repository, manage its settings, and perform various actions related to collaboration and development. If you initialized the repository with a READ-ME file, you'll find that file already present in your repository.
5.What is difference between local & remote repository? How to connect local to remote?
A local repository and a remote repository are concepts in distributed version control systems like Git.
Local Repository:
- A local repository is a copy of a Git repository that resides on your local machine. When you clone a repository or create a new one, you are essentially setting up a local copy of the project on your computer. This local copy contains the entire project history, branches, and files.
Remote Repository:
- A remote repository is a version of the project that is hosted on a server, separate from your local machine. Remote repositories can be on services like GitHub, GitLab, Bitbucket, or your own server. Remote repositories serve as a central location for collaboration. Multiple developers can push and pull changes to and from the remote repository, enabling collaboration on a shared codebase.
Connecting Local to Remote Repository:
To connect a local repository to a remote repository, follow these steps:
1. Create a Remote Repository:
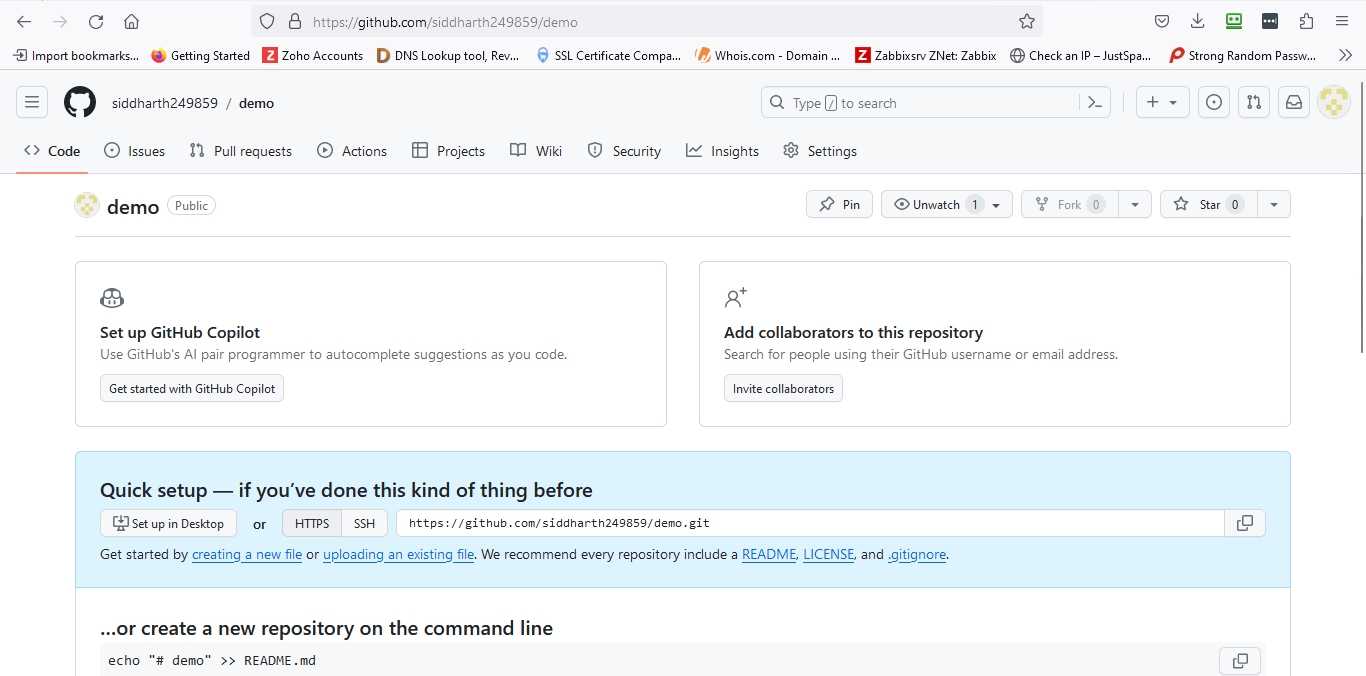
On a hosting service like GitHub, GitLab, or Bitbucket, create a new repository. Take note of the repository URL (you can usually find it on the repository's main page).
New repository created demo.
2. Navigate to Your Local Repository:
- Open a terminal or command prompt and navigate to your local Git repository.
3. Initialize a New Git Repository (if not already done):
If your project is not yet a Git repository, you can initialize it using the following command:
git init
4. Link the Local Repository to the Remote Repository:
Use the following command to add a remote repository. Replace
<repository_url>with the URL of your remote repository.git remote add origin <repository_url>Here, "origin" is a conventional name for the default remote repository, but you can choose a different name.
5. Verify the Connection:
To verify that your local repository is connected to the remote repository, use:
git remote -vThis command will show you the URLs of the remote repository.
6. Pull Remote Changes (Optional):
If there are existing files in the remote repository, you might want to pull them to your local repository using:
git pull origin masterThis fetches changes from the "master" branch of the "origin" (remote repository) and merges them into your local branch.
7. Push Local Changes to Remote Repository:
After making changes locally, you can push them to the remote repository using:
git push -u origin masterThis command pushes your changes to the "master" branch of the "origin" (remote repository). The
-uflag is used to set up tracking, so in the future, you can simply usegit pushwithout specifying the branch and remote.
Now, your local repository is connected to the remote repository. You can collaborate with others by pulling and pushing changes to the shared remote repository. Keep in mind that these instructions assume you are working with the "master" branch; adjust the branch name as needed for your project.
a)Set your user name and email address, which will be associated with your commits.
Setting your username and email in Git is essential for associating your commits with your identity. You can configure these settings globally or on a per-repository basis.
To set your username and email globally (applies to all repositories), you can use the following commands:
Set Global Username:
git config --global user.name "Your Name"
Set Global Email Address:
git config --global user.email "your_email@example.com"
Replace "Your Name" with your actual name and "your_email@example.com" with your actual email address. These commands will configure Git to use this name and email for all repositories on your machine.
To set them on a per-repository basis (specific to one repository), navigate to the repository directory in your terminal and use the same commands without the --global flag:
Set Username for a Specific Repository:
git config user.name "Your Name"
Set Email Address for a Specific Repository:
git config user.email "your_email@example.com"
Again, replace "Your Name" and "your_email@example.com" with your actual name and email address. These settings will be specific to the current repository only.
Verifying your configuration:
To check your Git configuration (including your username and email), you can use the following command:
git config --global --list
This command will display all your Git configuration settings, including your name and email. It's good practice to ensure that these settings are correctly set before making commits to your repositories.
b) Create a new repository on GitHub
Please follow below steps how to create a new repository on Github.
Steps:
Sign in to GitHub:
- Go to GitHub and sign in to your account.
Navigate to Your Dashboard:
- Once signed in, click on the GitHub logo in the top left corner to go to your dashboard.
Create a New Repository:
- In the upper-right corner of the GitHub page, click the "+" sign, and then select "New repository" from the dropdown menu.
Fill in Repository Information:
On the new repository page, fill in the following information:
Repository name: Enter "Devops" as the repository name.
Description: Optionally, provide a short description of the repository (if needed).
Visibility: Choose whether you want the repository to be public or private.
Initialize this repository with a README: You can choose to initialize your repository with a README file. This is optional.
Optional Settings (Optional):
- You can add a .gitignore file (selecting the appropriate template based on your project) and choose a license for your repository if needed.
Create Repository:
- Click the "Create repository" button at the bottom of the page to create your "Devops" repository.
Once the repository is created, you'll be directed to its main page on GitHub. From there, you can start adding files, managing settings, and collaborating with others on your Devops project.
C) Create a new file in Devops/Git/Day-02.txt & add some content to it.
Creating a new file named Day-02.txt within the Devops/Git directory on GitHub involves a few steps. To do this using the GitHub web interface:
Navigate to the Repository:
- Go to your "Devops" repository on GitHub.
Create a New File:
- Click on the "Add file" dropdown and select "Create new file."
Specify the File Path:
- In the "Name your file..." field, enter
Git/Day-02.txt. GitHub will automatically create the necessary directories (Gitin this case) if they don't exist.
- In the "Name your file..." field, enter
Add Content to the File:
- In the editing area, add the desired content to
Day-02.txt.
- In the editing area, add the desired content to
Commit Changes:
Scroll down to the "Commit new file" section.
Enter a commit message in the "Commit changes" field, describing what you've done (e.g., "Added Day-02.txt").
Choose to commit directly to the
mainbranch (or the default branch name of your repository).Click the "Commit new file" button to create the new file with the provided content.
This process will create a new file named Day-02.txt within the Devops/Git directory in your GitHub repository and add the content you specified.
D) Push your local commits to the repository on GitHub.
Push local commits to a repository on GitHub, you'll need to follow these steps.You have already have changes committed locally:
1. Add and Commit Changes Locally:
If you haven't done so already, add and commit your changes to your local Git repository:
# Stage changes for commit
git add .

# Commit changes with a descriptive message
git commit -m "Your commit message here"
Replace "Your commit message here" with a brief, descriptive message summarizing your changes.
2. Push Changes to GitHub:
After committing your changes locally, you can push these commits to the repository on GitHub using the git push command:
# Push changes to the 'main' branch (or your branch name)
git push origin main
This assumes that your local branch is tracking the main branch of your remote repository (named origin). If your branch has a different name or you're pushing to a branch other than main, adjust the command accordingly.
Note:
Make sure you're in the correct local repository directory in your terminal or command prompt when executing these commands.
If it's your first time pushing to the repository, you might need to authenticate with your GitHub credentials.
Substitute
mainwith the name of your default branch if it's different (e.g.,master).
After executing git push, your local commits will be pushed to the specified branch of your GitHub repository, making your changes available in the remote repository.